Managing multiple locations efficiently is crucial for organizations with multiple buildings, rooms, or campuses. This guide will walk you through how to import locations from a CSV file.
What We’ll Cover:
Preparing CSV’s for List of Locations
Importing a List of Locations
Preparing CSV’s for Importing Multi-level Locations
Importing your Locations
Important Notes
Preparing CSV’s for List of Locations
If you need to import a flat list of locations that do not have nested relationships, you can do so using a single CSV file. This is useful when importing locations such as individual offices, standalone facilities, or general locations without nested dependencies.
You will want to create a CSV file that follows a similar format as the example below. This CSV will import Location A, B, and C with the respective information. Ensure that you save and export as CSV.

Importing a List of Locations
Now that we have prepared our CSV file, we will log into Reftab and head into Settings > Import/Export Data > Import Locations.

Upload your CSV file. Verify that the column headers match correctly. Click “Import X Locations”. Check the Locations tab to confirm that your list of locations have been imported.

Preparing CSV’s for Importing Multi-level Locations
In Reftab, locations follow a three-level hierarchy:
- Grandparent – The highest-level location (e.g., Campus, Headquarters)
- Parent – A location nested under the grandparent (e.g., Building, Department)
- Child – The lowest-level location, nested under a parent (e.g., Room, Office)
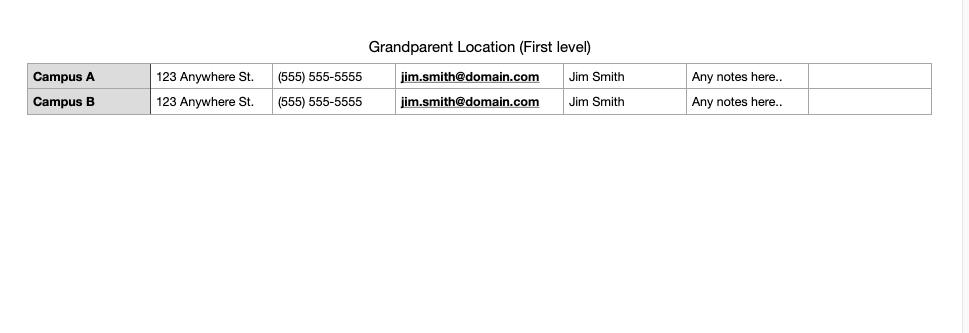
To ensure a proper import, you will need three separate CSV files—one for each level. Each file should specify its respective parent location where applicable. The CSV below will import Campus A and Campus B, along with their respective information, as Grandparent locations. Since grandparent locations do not have a parent, the last column should remain blank. Ensure you save and export the file as a CSV.
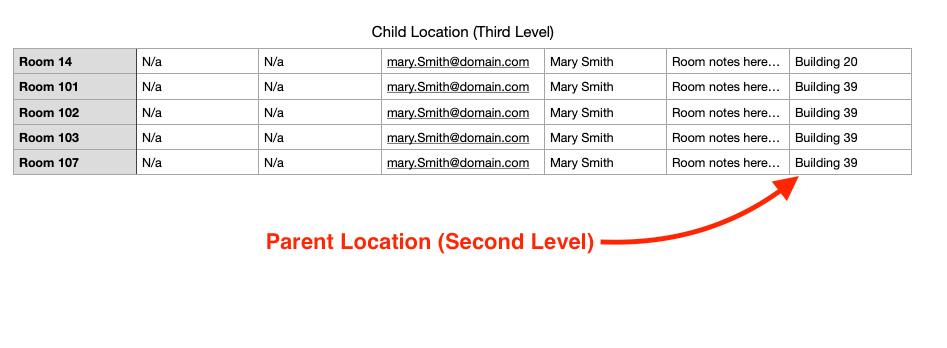
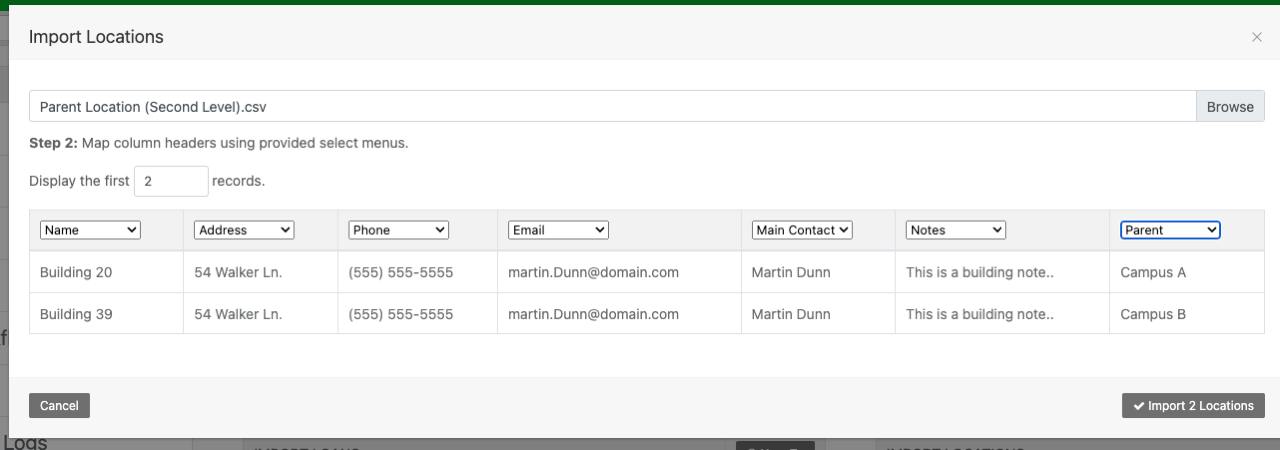
The CSV below will import Building 20 and Building 39 as Parent locations. Each parent location must reference a Grandparent location to which it belongs. Save and export as a CSV.

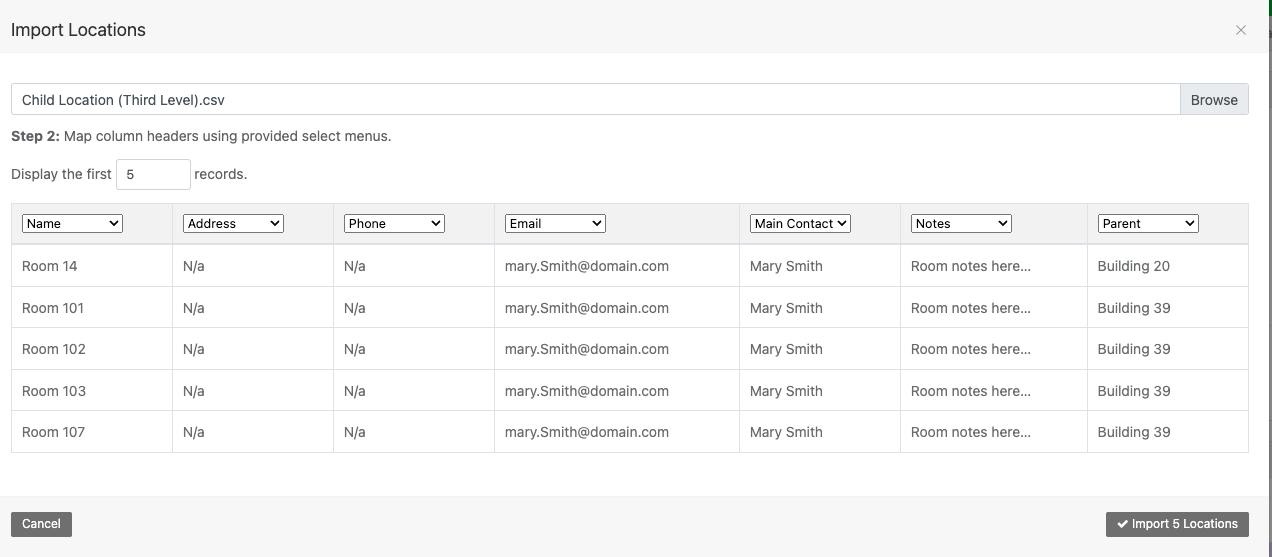
The CSV below will import all Room locations as Child locations. Each child location must reference a Parent location to which it belongs. Save and export as a CSV.
Importing your Locations
Now that we have prepared our CSV files, we will log into Reftab and head into Settings > Import/Export Data > Import Locations.

Importing Grandparent Location (First Level)
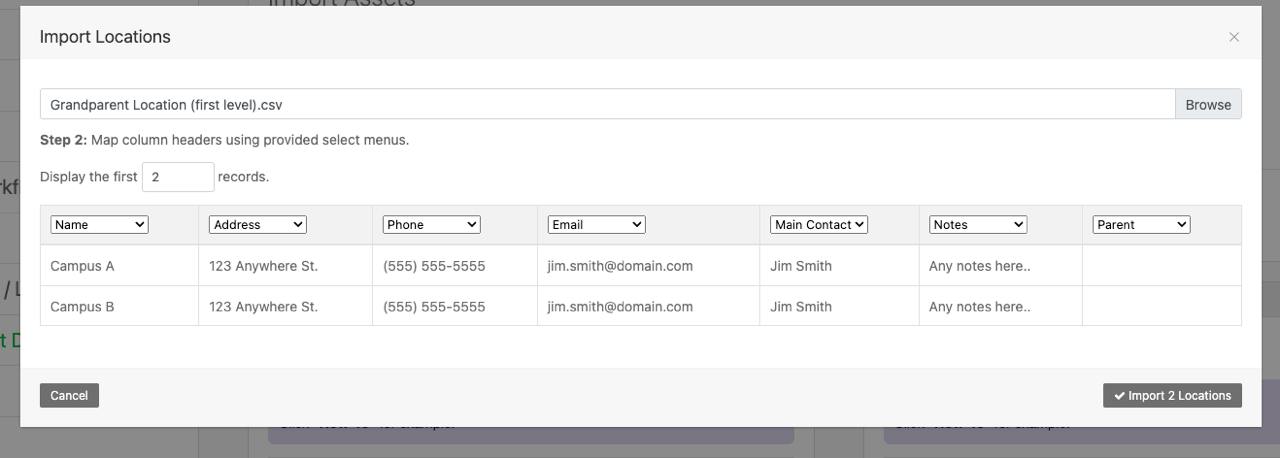
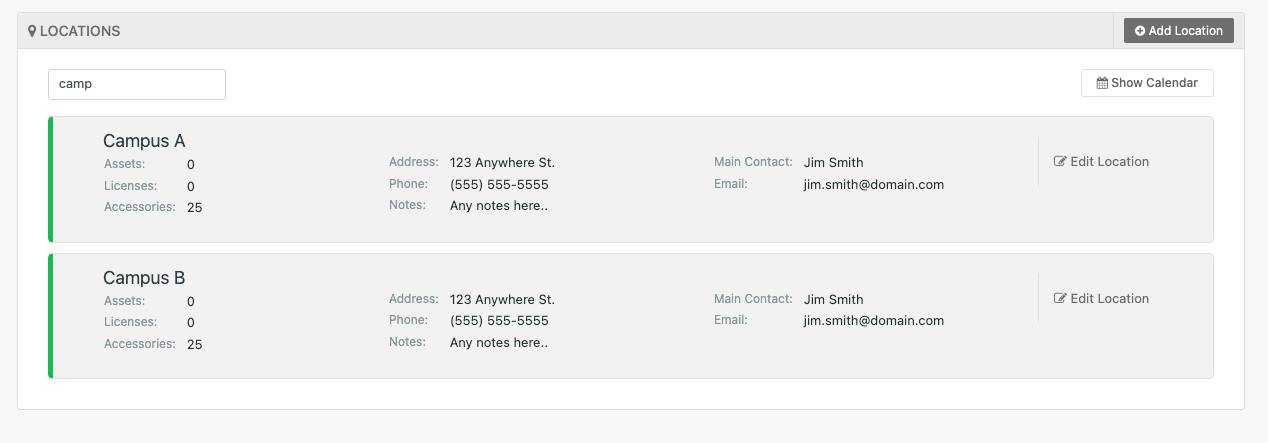
Upload your Grandparent CSV file. Verify that the column headers match correctly. Click “Import X Locations”. Check the Locations tab to confirm that your grandparent locations have been imported.
Importing Parent Location (Second Level)
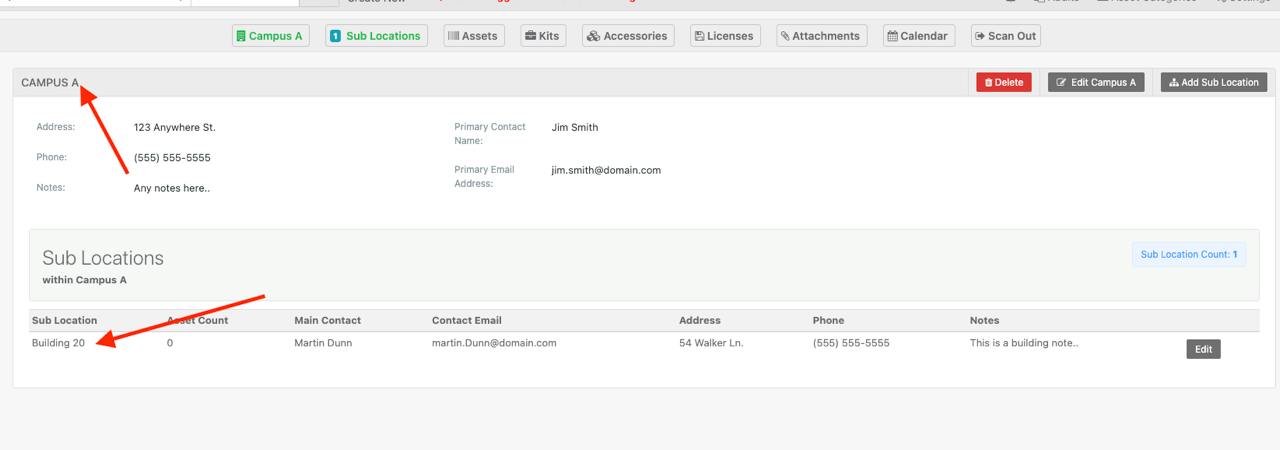
Upload your Parent CSV file. Ensure the headers are correctly mapped, especially the Parent column. Click “Import X Locations”. Verify that parent locations are nested under their respective grandparent locations.
Importing Child Location (Third Level)
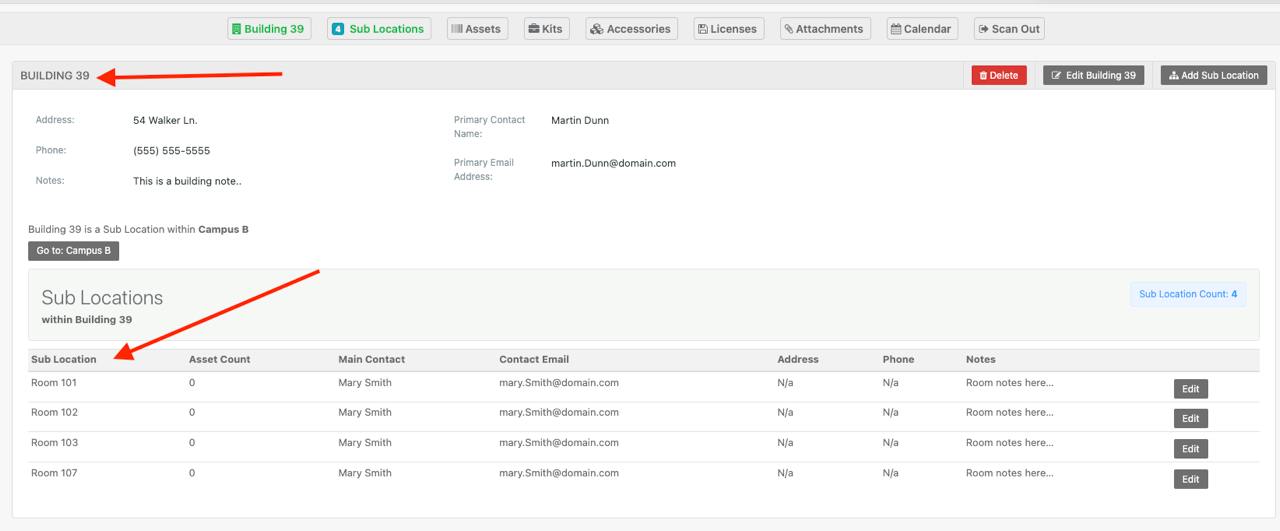
Upload your Child CSV file. Ensure headers are correctly mapped, particularly the Parent column. Click “Import X Locations”. Confirm that child locations are properly nested within their respective parent locations.
Important Notes
-
Hierarchy Matters: Always upload CSV files in the correct order: Grandparent → Parent → Child. Parent locations must exist before assigning child locations.
-
Accurate Mapping: Ensure that all column headers are correctly mapped during import to prevent errors.
- CSV Format: Always save and upload files in CSV format to ensure compatibility.
You’re Done! You have successfully imported your locations in bulk! If you need further assistance, feel free to reach out to help@reftab.com.