How to: Auto-Assign Asset Locations via Loanee Fields in Workflows
This guide explains how to use automated workflows in Reftab to move assets to a loanee’s location by referencing a dynamic loanee field. By doing so, assets can move between locations based on wherever the owner of the asset is. For example, if a user’s location is New York, this workflow would move the asset to the New York location automatically.
Most users use a SCIM integration to sync data between their identity systems, so that information about a user is automatically added to Reftab. If you haven’t setup your SCIM integration yet, check out these guides:
- Microsoft Entra SCIM Setup Guide
- Okta SCIM Setup Guide
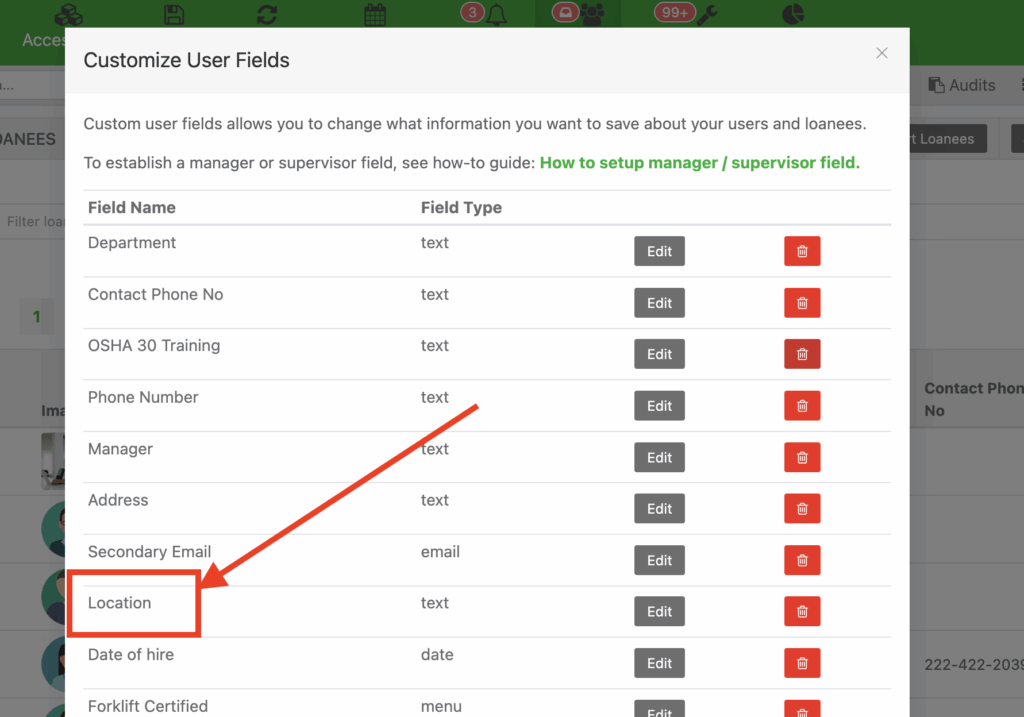
1. To start, sign in to your Reftab account and navigate to the Loanees tab at the top of the page and then click Custom Fields.

2. Create a custom field called Location with type of Text and save.
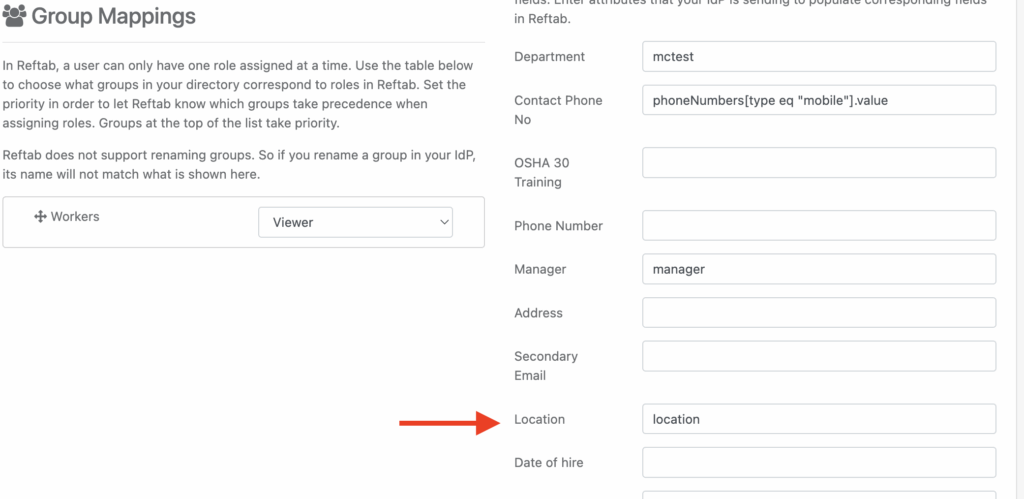
Note: At this point, this custom field can be used in your SCIM integration settings. Refer to the SCIM integration guides listed above to map this custom field.
3. Next, navigate to Settings then Automated Workflows

4. Click New Workflow

5. Create your workflow by configuring it as depicted below:
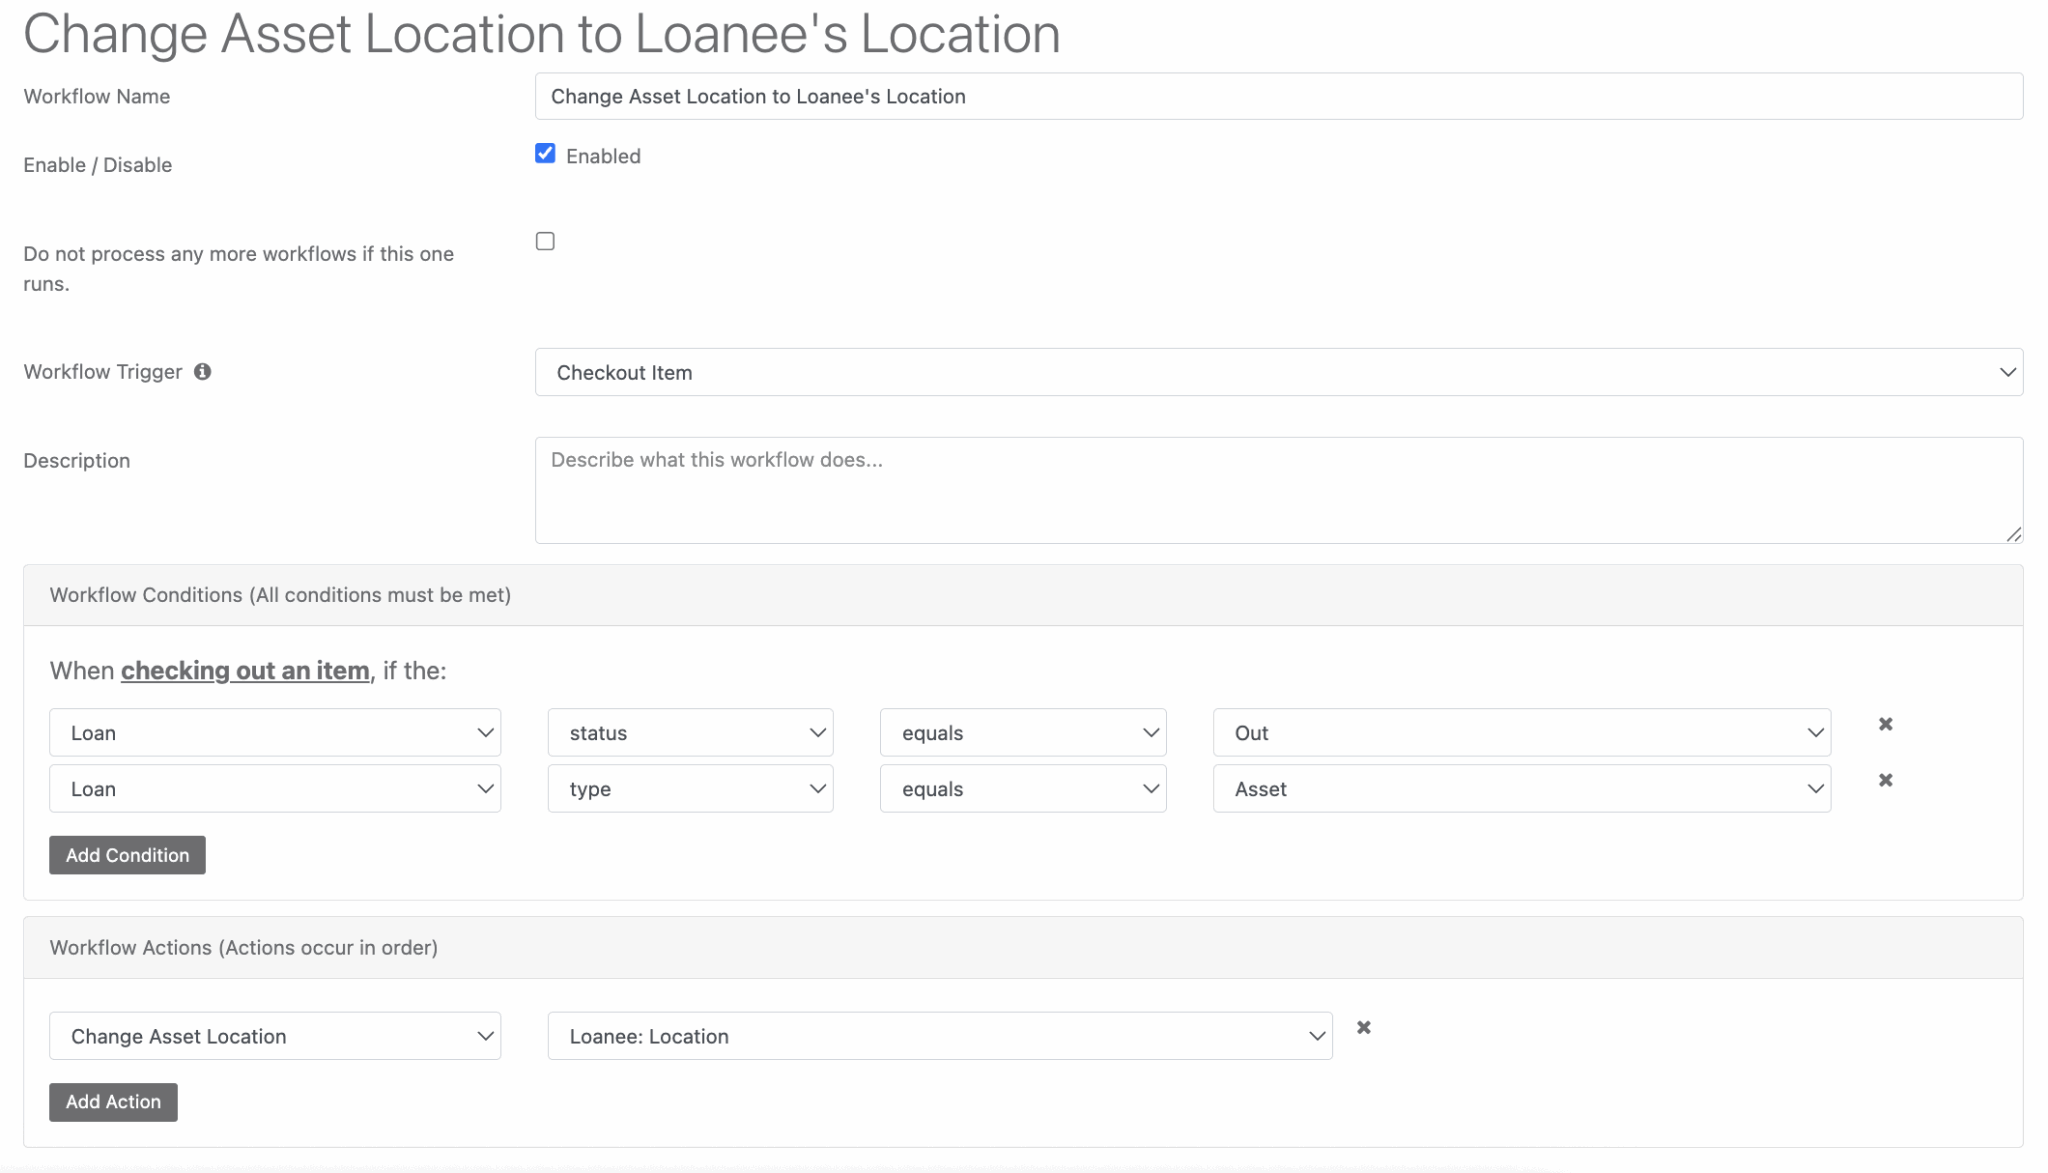
Note: You will want your action to be Change Asset Location and to set your next dropdown list to Loanee: Location (or whatever you have named this field).
6. Once configured, ensure you save the workflow.

Important Note
- If the value in the loanee’s saved location field does not match an existing location in Reftab, the workflow will not process the location change.
Your assets, simplified. Begin your journey with us!
50 assets free forever with unlimited inventory & software tracking. Includes email alerts, mobile apps, reports, custom asset tags and more.